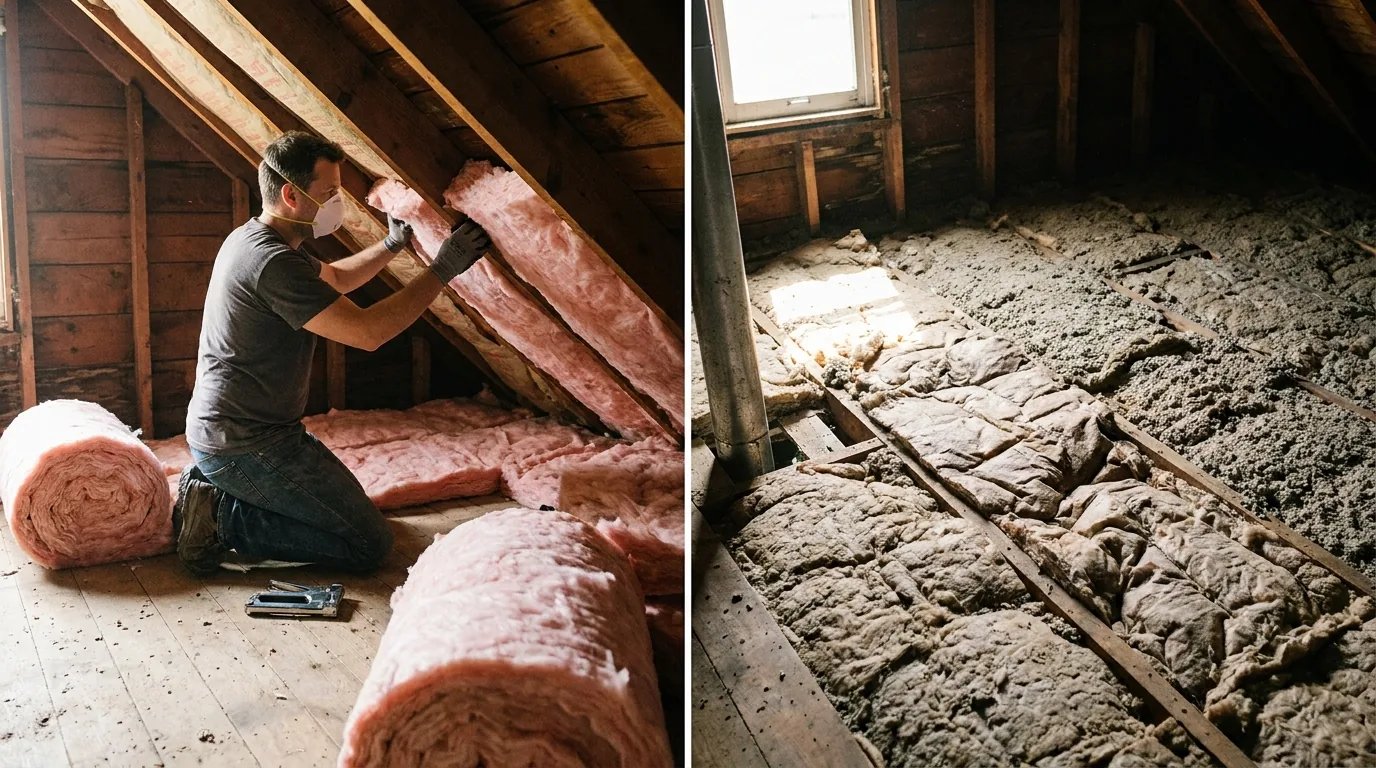
Adding insulation is one of the highest-return things any Ottawa homeowner can do. Our heating bills run 6 months a year. Every R-value you add to the attic pays back in heat retention and saves real money against natural gas or electric bills.
The DIY part is appealing for the same reason: a 1,200 sq ft attic top-up with blown cellulose is mostly the cost of the bagged material, and most suppliers lend the blowing machine free with a bulk purchase. The same job done by a contractor costs several times more once labour, equipment, and a warranty are added. The savings are real.
But "DIY attic insulation" covers two very different jobs. One is approachable for a careful homeowner. The other is a building science project that, done wrong, will rot your roof from the inside. Knowing which is which is the entire question.
The DIY-friendly job: top-up of an existing attic
Most Ottawa homes built between 1960 and 2000 have an attic insulated to R-12 to R-20. Modern Ontario Building Code requires R-60 for new construction. Anything below R-50 in your attic is leaving money on the floor every winter.
The DIY top-up:
- Inspect the existing attic for rot, mold, leaks, or rodent damage. Fix all of those first. If any of them are present, do not insulate over them.
- Air-seal the ceiling penetrations from the attic side: top plates, electrical boxes, plumbing stacks, recessed light cans (must be IC-rated airtight cans), bathroom fan housings. Caulk and foam everything.
- Install attic baffles (also called rafter vents) at every eave to keep the new insulation from blocking the soffit ventilation. Baffles maintain a clear air channel from soffit vents to ridge or roof vents.
- Make sure the existing vapour barrier (the poly sheet under your ceiling drywall) is intact and continuous. If it isn't, you have a different problem and topping up insulation will make it worse.
- Rent a blower from the home center or insulation supplier (free with the bag purchase, usually). Run the hose into the attic, blow loose-fill cellulose to the depth that hits R-50 (about 14 inches over R-12) or R-60 (about 17 inches over R-12).
For a 1,200 sq ft attic going from R-12 to R-50, you need roughly 60 to 70 bags of blown cellulose. The supplier sets up the blower and the hose. You feed bags into the hopper, your helper holds the hose in the attic. The job takes 4 to 6 hours including setup.
The pre-insulation check that DIYers skip
Walk the attic with a flashlight before you blow anything. Look for: dark stains on the underside of the roof sheathing (water leaks), brown or black powdery patches (mold), insulation that is matted, dirty, or smells (rodent activity), bath fan ducts that vent into the attic instead of through the roof.
Every one of those is a problem you have to fix BEFORE adding insulation. Burying it under fresh cellulose just hides the issue and makes the eventual repair cost double.
Vapour barrier: the issue most DIYers don't understand
In a cold climate like Ottawa, the vapour barrier sits on the warm side of the insulation, which means it sits between the ceiling drywall and the attic insulation, not on top. The poly sheet keeps the warm, moist indoor air from migrating up into the cold attic, where it would condense on the underside of the roof sheathing and cause rot.
The right configuration: drywall ceiling, vapour barrier (poly), insulation, attic, ventilation, roof sheathing.
The wrong configuration that DIYers create: drywall ceiling, original poly, original R-12 insulation, NEW vapour barrier laid on top of the old insulation, NEW R-30 insulation on top of that. Now you have two vapour barriers with insulation sandwiched between them. Any moisture that does get past the first barrier gets trapped between the two and condenses inside the assembly. Rot in 5 to 10 years.
The rule: add insulation on top of the existing assembly without adding another vapour barrier. The original poly under the drywall does the job. Blown cellulose is vapour-permeable and lets any incidental moisture pass through it.
If the original vapour barrier is damaged, missing, or your house was built before 1965 (when poly wasn't standard), you have a different project. That's a ceiling rebuild, not an insulation top-up.
Air sealing: the part that matters more than R-value
Insulation slows heat conduction. It does not stop air movement. If your ceiling has unsealed gaps (around recessed lights, around plumbing stacks, around the attic hatch, at top plates of interior walls), warm air leaks straight up through the insulation regardless of how thick it is.
An attic with R-50 insulation but unsealed penetrations performs about as well as an attic with R-30 and properly sealed penetrations. Air sealing is at least as important as R-value.
The DIY air-seal kit:
- Cans of expanding spray foam (great stuff or equivalent) for gaps over 1/4 inch
- Acoustic sealant or fire-rated caulk for smaller gaps
- Rigid foam board cut to fit over plumbing stacks, then caulked at the edges
- Pre-formed insulating attic hatch covers (or build one from rigid foam)
- Replacement IC-rated airtight pot lights if your existing recessed cans aren't IC-rated
Spend a full day on air sealing before the cellulose goes in. The energy savings from sealing exceed the savings from the insulation top-up alone.
Where DIY attic insulation goes wrong
The four failures we see on attic projects done by previous homeowners:
- Insulation buried existing rot. Roof leak was active. Homeowner blew cellulose over wet sheathing. Mold grew under the insulation. Roof framing rotted before anybody could see it. We found one in Westboro last year where the homeowner had insulated over a slow drip from a chimney flashing leak. The roof sheathing was black across a 4 ft x 6 ft area. A full strip-down and framing repair followed — far more than the original insulation ever would have cost.
- Soffit vents blocked. Cellulose blown directly to the eaves, no baffles installed. Soffit airflow blocked. Attic stops drying. Ice dams form on the roof every winter. Sheathing rots from above.
- Bath fan venting into the attic. A fan that exhausted into the attic (instead of through the roof) was buried under new insulation. The fan moves a few cubic metres per minute of moist air directly into the cold attic, where it condenses on the new insulation and the sheathing. Winter ice forms on the underside of the roof.
- Knob-and-tube wiring buried. Older homes (pre-1950s) sometimes still have knob-and-tube wiring in the attic. The Ontario Electrical Safety Code prohibits burying knob-and-tube under insulation because the wiring relies on air to dissipate heat. Buried, it overheats. Fire risk. Insurance won't cover the resulting claim.
Why hot-roof spray foam is professional work only
"Hot roof" or unvented assembly construction means insulating the underside of the roof deck (between the rafters) instead of the attic floor, eliminating the attic ventilation and bringing the attic into the conditioned envelope.
It's the right call for cathedral ceilings, attic conversions, and any space you're going to use as living space. It performs better than vented attics in some conditions. It's also the most building-science-sensitive insulation job in residential construction.
Why it's pro work:
- Closed-cell spray foam requires a licensed installer. The chemicals are A-side and B-side reagents that mix in the spray gun. The mix ratio determines whether the foam cures properly. A bad mix produces foam that off-gasses for years and can make a house uninhabitable.
- The foam has to be applied at specific temperatures and humidity ranges. Outside those ranges, the foam shrinks, cracks, or fails to adhere.
- The thickness has to hit specific R-values per pass to control the exotherm (heat from the chemical reaction). Too thick a single pass and the foam scorches and creates fire risk during installation.
- Open-cell vs closed-cell selection depends on the climate, the assembly, and whether a vapour barrier is needed in addition.
- The Ontario Building Code requires an air barrier and a thermal barrier (typically drywall) over any spray foam. Foam alone is not code-compliant as a finished assembly.
DIY spray foam kits exist (Tiger Foam, Foam It Green) and they're appropriate for small jobs (sealing rim joists, filling small cavities). Using them to insulate a full roof assembly is not.
A proper closed-cell roof spray foam job in Ottawa is priced by board foot and depends on the target R-value and roof area, but the assembly is engineered and warrantied — which is what you're paying for over a DIY kit.
The attic is the cheapest insulation job in any house and the easiest to ruin. Every dollar spent on air sealing and pre-inspection pays back. Every dollar spent racing past the inspection step to "save time" comes back as rot in five years.
The honest DIY attic call
DIY blown cellulose top-up over a clean, dry, unmodified attic with a proper existing vapour barrier and good ventilation: yes. This is one of the most cost-effective DIY projects in any Ottawa home.
DIY anything in an attic with rot, mold, leaks, knob-and-tube, missing vapour barrier, or any plan to convert the attic into living space: no. Get a building inspection, fix the problems, and have a contractor build the assembly correctly. Attic conversion projects in particular involve permits, structural review, and building science that goes well past what bagged cellulose can handle.
The good news: most Ottawa attics that just need more R-value qualify for the DIY job. Walk yours, inspect carefully, and if everything looks clean, this is one of the projects worth taking on yourself.
Frequently asked questions
How much attic insulation does an Ottawa home need?
Modern Ontario Building Code requires R-60 attic insulation for new construction, and anything below R-50 in an existing attic loses heat every winter. Most Ottawa homes built between 1960 and 2000 have only R-12 to R-20. Topping up with blown cellulose over R-12 takes about 14 inches to reach R-50 and about 17 inches to reach R-60.
Should I add a new vapour barrier when topping up attic insulation?
A new vapour barrier should never be added when topping up attic insulation. In a cold climate like Ottawa, the vapour barrier belongs on the warm side, between the ceiling drywall and the insulation. Laying a second poly sheet over old insulation traps moisture between two barriers, where it condenses and causes rot in 5 to 10 years. Blown cellulose is vapour-permeable and goes straight on top.
What should I check in the attic before adding insulation?
Before adding attic insulation, walk the attic with a flashlight and look for dark stains on the underside of the roof sheathing, brown or black powdery patches of mold, matted or smelly insulation from rodents, and bath fan ducts venting into the attic instead of through the roof. Also check for knob-and-tube wiring, which must not be buried. Fix every problem before any insulation goes in.
Why do attic baffles matter when blowing in insulation?
Attic baffles, also called rafter vents, keep blown insulation from blocking the soffit vents at every eave, preserving a clear air channel from the soffits to the ridge or roof vents. Without baffles, cellulose blown to the eaves chokes the soffit airflow, the attic stops drying, ice dams form every winter, and the sheathing rots from above. Install baffles before any insulation goes in.
Can I spray foam my own roof deck?
Spray foaming a full roof deck, called a hot roof or unvented assembly, is professional work. Closed-cell foam needs a licensed installer, a correct mix of A-side and B-side reagents, specific temperature and humidity ranges, and limited thickness per pass to control the heat of the reaction.
The Ontario Building Code also requires an air barrier and a thermal barrier, typically drywall, over any spray foam. DIY kits suit small jobs such as rim joists.
Official references
- Keeping the Heat In, Natural Resources Canada
- Who can do electrical work at my property?, Electrical Safety Authority